 Support")
How do you create a Task in CMST
A task is a specific piece of work that needs to be completed by a certain deadline date. Good task management helps employees stay productive by setting clear priorities and making delegation easier.
Using a task management tool can replace the need for email and chat to communicate about tasks. It lets you organize and track tasks easily, assign them to team members, and see who’s working on what. You can view all task details and discussions in one place, which helps keep everything on track and provides a clear overview of task status—whether it’s Pending, In progress, Completed, or Important.
Benefits of a Task
- Efficient Task Management.
- Uninterrupted Communication.
- Improved Accessibility.
- Transparency.
- It solves the problem of forgetfulness.
Here is a small guide on how can you create a Task in CMST.
- Log in to your CMST account.
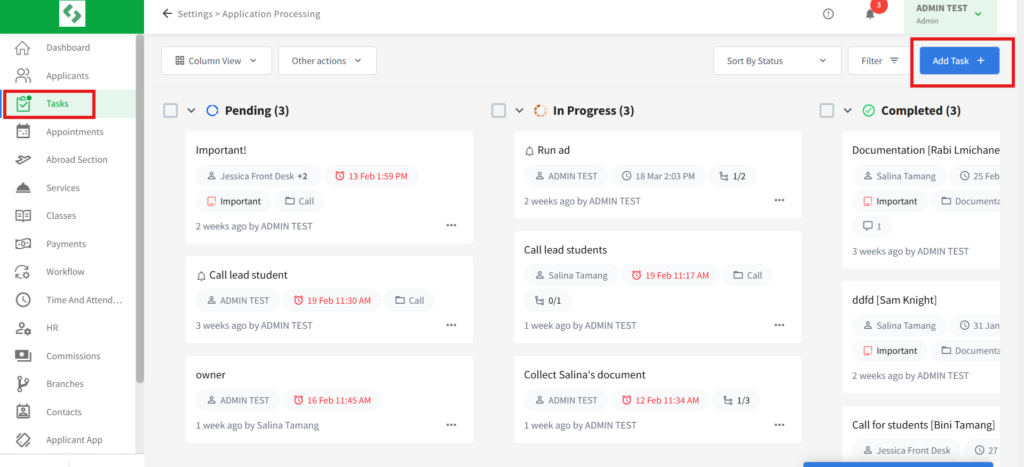
- From the left pane, access “Task”.
- It provides access to a board where you can see the “Add Task” button.
- A new dialog box appear where you can input the following:
- If the task is for you, you can toggle on the “Add as Reminder” button. If the task is to be assigned for other users then keep the button off.
- “Title”(Give a suitable title to the task),
- “Description”(add the description for an overview to the task being created),
- “Deadline date” (add the date you want the task to be complete) and
- “Deadline time”(add the time you want the task to be complete)
- “Assign” (selecting this enables you to select the responsible user for the task being created),
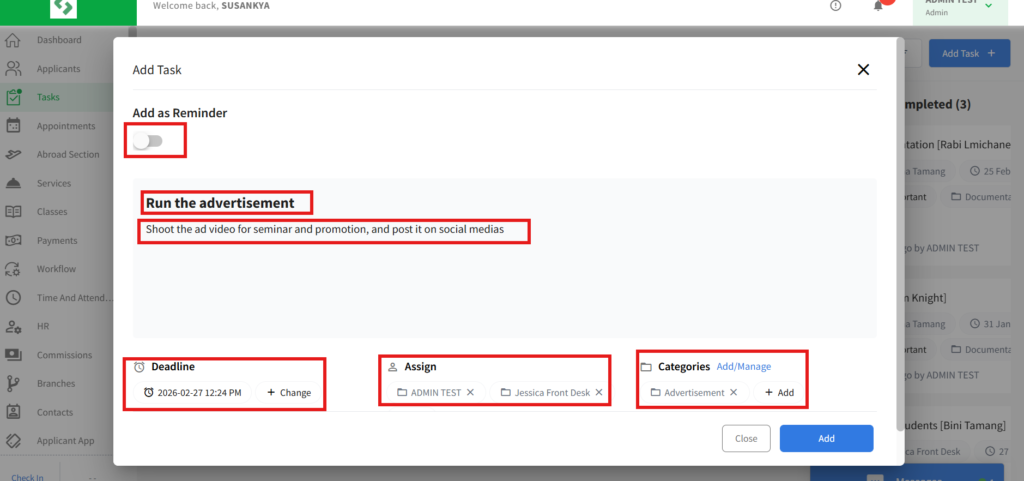
- Click on the “Save” once you complete the appeared dialogue box.
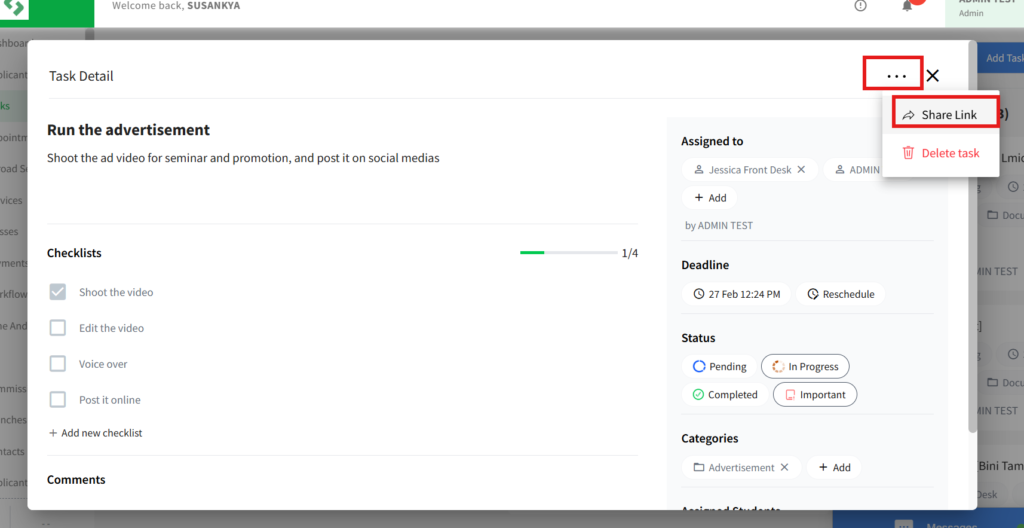
- To get a detailed view of the created task, click on it.
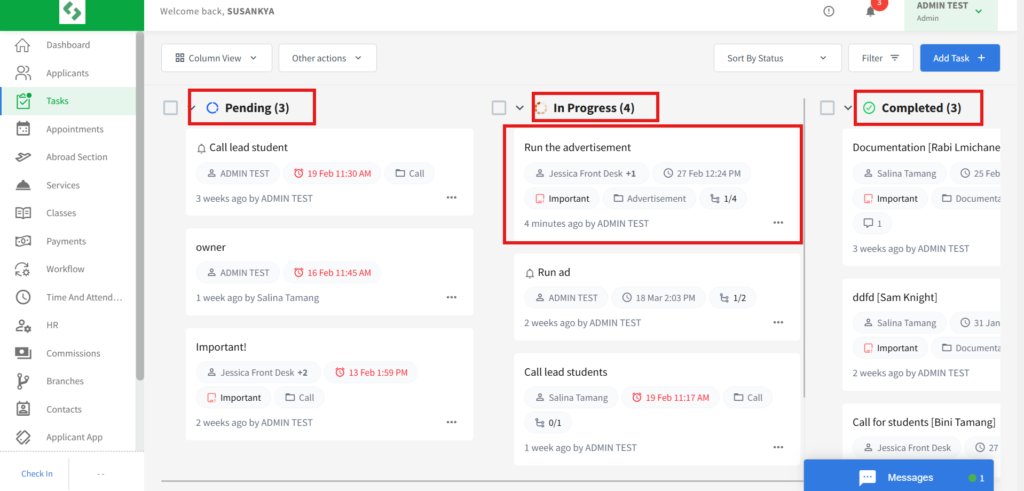
- Here, you can create the checklist for the tasks. The status bar shows your task status. If the task is yet to be started, then mark the status as pending. If the task in ongoing, then mark it In progress.
- If you are working on a task and you find it important, then mark the task as important. And after the completion, mark it as completed.
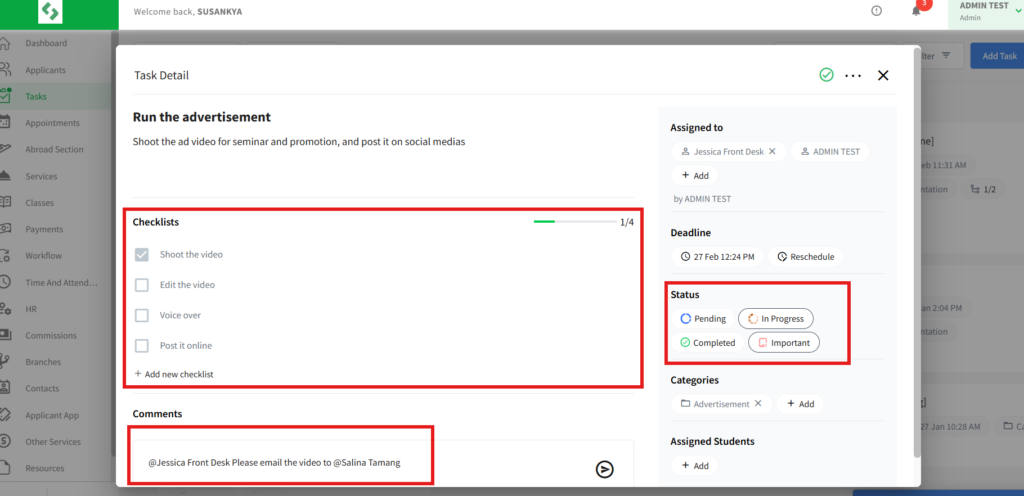
- Further, you are able to add the Description, create a Checklist (if required), and Comment (if any). You can also mention users in the comment section.
- The “Action” allows you to Get Shareable link (easy access to the task), and Delete.
Additional
- A checklist is a preference that enables the creator to distribute a task. The multiple checklists act as actions for the task being created.
- On the right-hand side of the dialogue box you can see the status for the specific task being created, which helps you to get the overview.
- “Deadline” (Here you can extend the task deadline).
- “Assignee” (Here you can add more users to the task).
- “Assign Student” ( Here the student could be associated to the task being created)
- “Get Shareable Link” ( You can access the link to share the Task).
- “Delete” ( Here you can Delete a task if needed).